A Step-by-Step Guide to Installing a MERV 8 9.75x23.75x1 HVAC Air Filter
Now let us have your MERV 8 air filter installed. As safety is the foremost priority, turn off your HVAC system. Once that's done, it's time to play detective and find your filter compartment. You'll find it in the furnace or air handler unit.
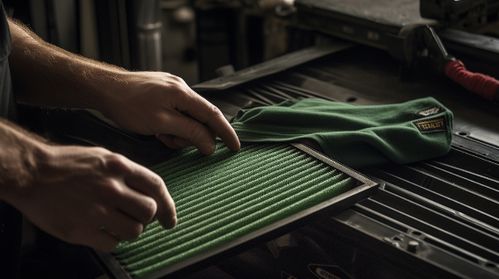
Before we get rid of the old filter, let's take a quick note of its direction. This is super important for proper airflow orientation. Now, you can gently slide it out and dispose of it responsibly.
Alright, onto the new filter! Check your new MERV 8 filter for size and any visible damage. When you're ready to install it, line up the frame's arrow with the direction of airflow toward the ducting. Make that it fits tightly and without any openings.
And you are done, exactly like that! Go ahead and turn your system back on and check for smooth airflow. In addition to cleaning your air, this simple procedure extends the life of your system. These actions guarantee excellent performance and air quality in your house.
Key Takeaways
First things first, always ensure safety by powering down your HVAC system before starting any installation. With that done, take a moment to look over your new MERV 8 filter. Confirm that the size matches and check for any possible damage. You want to be sure everything is in top shape for this installation.
Now, let's find the filter compartment. You should locate this in either your return air grille or the air handler unit of your HVAC system. Got it? Great! Next up is placing your MERV 8 filter into the compartment. Remember to align the arrow on the frame to face the ductwork; this indicates the direction of airflow.
Check for any openings around the filter after it is firmly in place. The efficiency of filtration and best airflow depend on a tight fit. There you go! You've successfully installed your new MERV 8 9.75x23.75x1 HVAC air filter.
Table of Contents
Understanding MERV Ratings

Allow me to first go over MERV ratings before we go into MERV 8 filters. The Minimum Efficiency Reporting Value, or MERV, gauges how well an air filter works. All that better filtration—which captures everything from dust mites and mold spores to germs and tobacco smoke—means a higher MERV score.
So, why choose MERV 8? Big particles like pollen, dust mites, and mold spores are very well captured by this type of filter. In doing this, dwellings' air quality improves dramatically. This level of filtration suits most residences, offering a clean, healthy environment without overworking your HVAC system.
Knowing the benefits linked with MERV ratings is vital. Choosing MERV 8 9.75x23.75x1 HVAC air filter means that your house will have cleaner air flowing through it. But this concerns protecting health more than it does comfort. The correct filter can make a big difference in lowering the health risks associated with allergies and asthma because fine particles can exacerbate these conditions.
Preparing for Installation
You now know why MERV ratings matter and why a MERV 8 filter could be ideal for you. Allow me to now go into preparing for its installation in your HVAC system. Preparation is key for a seamless process, ensuring your system runs like clockwork with this new addition.
First up, let's talk about cleanliness. For a smooth installation, you need a spotless workspace. Clear out any dust, debris, or tools that might cause a hiccup in the process. A tidy workspace keeps your new filter free from contamination.
Next on the list, consider how you're going to store the filter before installing it. To prevent any possible wear and tear or damage, keep this new addition somewhere dry and clean. How therefore can one ensure that they are prepared for the assignment? Here are a few steps to guide you:
Check out your new filter: Is it free from damage? Does it match the size of your HVAC unit?
Get your tools ready: You might need a screwdriver to open up the filter compartment.
Switch off your HVAC system: Safety first, always!
Go through the installation guide: Understand any specific steps or precautions to take.
Follow these steps and you'll be all set to install your new filter.
Locating Your HVAC Filter
Locating your existing MERV 8 HVAC air filter within your system is necessary before you can install a new one. This stage calls for a few simple instruments and knowledge of safety measures to avoid mishaps.
Identifying the filter's location is the first crucial step in ensuring a successful installation.
Identify Filter Location
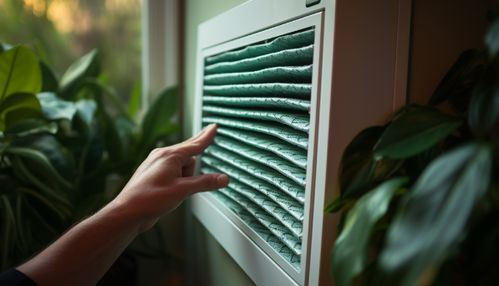
Looking for your HVAC filter's location? Start by examining the air handler unit or peeking behind the return air grille. Sometimes, you might even find it nestled in a slot in the furnace. Knowing the different filter types and potential locations can make installing your filter a breeze.
Here's what you need to keep in mind:
Air Handler Unit: This often serves as a home for your filter. Look for a slot.
Return Air Grille: Some systems prefer to place filters directly behind a grille, which can be on the wall or ceiling.
Furnace Slot: Often found in heating-integrated systems, this location is quite common.
Filter Types: Ensure your filter (MERV 8, for example) matches your system's needs.
Correctly identifying both location and filter type promotes efficient operation of your HVAC system, keeping your home's air clean.
Tools Needed
Did you get your HVAC filter location figured out? Great! Now, just gather a few essential tools to get the job done. For example, you might need a screwdriver to pry open the cover or access panel.
But don't forget to check that trusty maintenance schedule! Replacing your filter at recommended intervals is key for preserving air quality and keeping your system in top shape. Not sure when to replace your filter? No worries, this can vary based on your particular HVAC setup and the lifespan of your filter.
Consistent replacement not only helps you breathe easier but also safeguards your system. So, don't skip on this important task. And never forget, knowing how long your filter will last is essential to making sure your HVAC system functions like a well-oiled machine.
Lastly, while special tools aren't often needed, a flashlight can come in handy for lighting up those hard-to-reach, shadowy corners around your HVAC unit.
Safety Precautions
Switching off your HVAC system before hunting for the filter is a smart move to avoid mishaps. Keeping yourself safe throughout this process is of utmost importance.
Here are some pointers to help you stay safe:
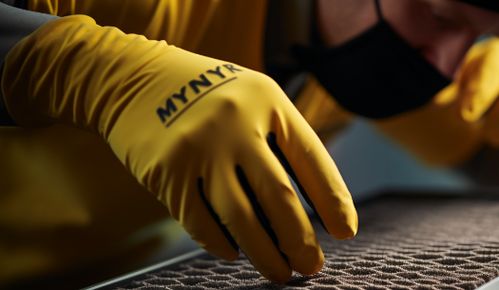
Suit Up: Donning gloves plus a mask shields you from dust along with other particles.
Allergy Alert: Those with dust sensitivities or allergies, need extra protection.
Ventilation Matters: Ensure fresh air circulation by opening windows.
Eye Care: Safety goggles can help prevent dust from irritating your eyes.
Removing the Old Filter
Now that you've located your HVAC filter, it's time to safely remove the old one.
First, ensure your HVAC system is turned off to avoid any airflow or safety issues during the process.
Carefully slide out the old filter, paying attention to its orientation so you can easily install the new one in the correct direction.
Identify Filter Location
First things first, you need to pinpoint where your HVAC system's air filter compartment is. This is usually nestled within the return duct or cozily tucked inside the furnace or air handler. Spotting the correct spot is crucial not only for filter efficiency but also when you need to prepare for seasonal changes that could influence how your system functions. Let me drop some hints to help you out:
You'll find an access panel somewhere near your furnace or air handler. Seek and you'll find.
Your return air duct might be hiding a slot that houses the filter. Give it a thorough look.
In case your home boasts multiple HVAC units, make sure you're investigating the right one.
Seasonal changes can be tricky and might necessitate more frequent checks and swaps to keep your filter in top shape. So, keep an eye out for these.
Safely Remove Old Filter
You've found your HVAC system's filter compartment - great job! Now, let's proceed with the safe removal of that old filter for replacement. Switch off your HVAC system first, as this stops any unfiltered air from circulating. You'll want to slide out the old filter with care to avoid knocking any trapped debris loose.
Why the caution, you ask? Well, this filter is laden with contaminants that could affect your health. So, make sure to handle it with care. Once it's out, seal it up in a plastic bag. This will prevent any of those nasty airborne particles from escaping during disposal.
Disposing of your used filter promptly is key to reducing potential health risks. By doing this, we're ensuring everyone's safety from airborne irritants. Remember, regularly maintaining your filter is more than just about system efficiency - it's a health measure, too.
Checking Filter Orientation
So you're about to install your MERV 8 HVAC air filter? Good choice! But let's take a moment to double-check its orientation. This isn't just about getting your HVAC system to perform at its best. It's also about extending the life of your filter. Get this wrong, and you might end up with inefficient filtering, rising energy costs, and extra strain on your system.
Now, why does orientation matter?
First off, filters are designed for directional airflow. In other words, they work best when air travels through them in a certain direction.
Secondly, your system's efficiency hinges on proper orientation. Get this right, and your system won't have to work harder than necessary. That translates into savings on your energy bills.
Thirdly, filters that are oriented correctly tend to have longer lifespans. That's because they can trap particles more effectively without getting clogged too soon.
Lastly, if filters are installed incorrectly, both air quality and system performance can take a hit. This can lead to maintenance issues in the future.
Look for an arrow or a similar indication on the frame of your filter. It will show you the direction of the airflow. This arrow should point toward the ductwork, not toward the return air grille. This simple step can make a big difference in the effectiveness and lifespan of your filter.
Installing the New Filter
Popped your MERV 8 filter in place yet? Remember, aligning the arrow on its frame with the airflow direction going toward the ductwork is key. This action is crucial for keeping your HVAC system efficient. By getting the orientation right, you ensure smooth airflow through the filter, which maximizes particle removal without restricting airflow. A correctly installed filter doesn't just improve air quality - it also boosts your HVAC system's efficiency significantly.
Ever wondered about the lifespan of your filter? It's an essential piece of information for maintaining system efficiency. Typically, you should be looking at swapping out your MERV 8 filter every three months. However, this timetable might change depending on your home's air quality and how often you use the system. Beware of clogged or dirty filters - they can put a strain on your HVAC system, which could lead to higher energy bills and potentially expensive repairs.
Post-Installation Checklist
So, you've got your MERV 8 filter installed - great job! But let's not stop there. Let's make sure everything is looking good and working well.
Here are some steps to follow:
First up, let's take a look at the filter fit. You want your new filter to fit like a glove in its slot, with no gaps around the sides. This tight fit keeps all unfiltered air from sneaking past.
Next, let's conduct an airflow test. This simple test ensures that air is moving freely through your new filter. If airflow feels reduced, this could indicate something's not quite right with the installation or maybe the filter size isn't correct.
Now, take a moment to inspect for any damage. During installation, things can sometimes get a little rough. You want to make sure no harm has come to your filter or its housing, as this could affect how well your filter performs.
Lastly, let's get that maintenance schedule on the calendar. For MERV 8 filters, a good rule of thumb is to check them every three months. However, depending on use and your environment, this timeframe can vary.
Frequently Asked Questions
Can Using a MERV 8 Filter Impact My HVAC System's Energy Consumption?
Sure thing, using MERV 8 filters could indeed affect your HVAC system's energy usage. You'll notice improved airflow, and higher efficiency, which could lower energy costs. That said, don't forget to take into account the lifespan of filters plus initial investment for total savings.
How Often Should I Replace a MERV 8 9.75x23.75x1 Air Filter to Maintain Optimal Air Quality?
Got a MERV 8 air filter measuring 9.75x23.75x1? Consider replacing it every 90 days. This regular change ensures optimal air quality. Bonus? Your HVAC system runs smoother, giving that filter more lifespan while keeping your breathing air fresh and clean.
Are There Specific Environments or Locations Where a MERV 8 Filter Would Not Be Recommended?
Sure, you'll find environments where MERV 8 filters may not be the best fit. If you're dealing with dusty conditions or high levels of pollution, filters with better MERV ratings are needed.
Can a MERV 8 Air Filter Help Reduce Allergy Symptoms, and if So, How Effective Is It Compared to Higher MERV Ratings?
Sure thing, the MERV 8 filter could be your ally in the battle against allergy symptoms. This type of filter is quite handy in trapping dust and pollen. But here's the catch. When compared to filters with bigger MERV ratings, this one doesn't quite measure up. Two factors play into this. One is the filter material. Second, you might face some hiccups while installing this filter. So, while it can help, there are more effective options out there.
If My HVAC System Is Older, Do I Need to Make Any Adjustments or Considerations Before Installing a MERV 8 Filter?
Got an old HVAC system, have you? Well, before popping in that MERV 8 filter, make sure to do some checks. Filter size matters here; you want to ensure that perfect fit. Why is that you might ask? Well, a good fit prevents unwanted airflow problems or undue strain on the system. Right tools make installation a breeze, so consider if adjustments are needed for this task.
Looking for quality HVAC care? Here is just one of our HVAC Solutions branches…
Filterbuy HVAC Solutions - Miami FL
1300 S Miami Ave Unit 4806, Miami, FL 33130
(305) 306-5027
https://maps.app.goo.gl/1Y7FZGsYN4mzK5kZ8


Comments
Post a Comment